Deprecation Warning
Please note this post refers to a deprecated version of the Eris stack. It is retained for historical purposes.
Peer server networks are one of the most important aspects of running any distributed system – of which blockchains can easily be classified. For developers seeking to build application specific blockchains, they will obviously have the responsibility of establishing the peer server networks which their application specific blockchains hook into. Whether developers are also using other blockchains or not, alongside an application specific blockchain the same principles will apply.
In preparation for our next round of beta testing on our video sharing distributed application 2gather we have been working to understand how to most easily deploy and maintain peer server networks. The rest of this is the current paradigm we are using to establish application specific peer server networks.
The Tools
We use four tools along this pipeline:
- Docker – an application specific container format which is lighter than a virtual machine image and is generally the paradigm which most modern cloud based deployment systems are moving toward.
- Tutum – a docker provisioning and deployment tool which makes it incredibly simple to provision, configure, and deploy containers.
- AWS and Digital Ocean – we have established a distributed peer server network using AWS and DO metal and these nodes are connected into Tutum’s provisioning and deployment system using AWS and DO API keys.
- The erisDB container (deprecated) – this container is a running blockchain node which has been configured to operate in a specific manner.
These four tools work together along a pipeline which allows us to deploy, configure, and redeploy containers and blockchain peer server nodes very simply and incredibly quickly.
The erisDB container is built as part of our continuous integration and continuous deployment system so the container is always updated with EPM’s master branch: docker pull eris/erisdb:latest. We also build and push containers for the develop branch using the unstable tag.
Using these three tools we set up three different types of nodes; these different types of nodes all use the same base container but using the erisDB start script (deprecated) we are able to have very flexible deployment and configuration of the blockchain client. I’ll work through these three node types.
Node Type 1: The Genesis Server Node
The first type of node we use is what I call the genesis_server node. It has one, and only one, purpose – to serve the genesis block to the other nodes. Because of how eris:db has been designed to sink different contracts into a genesis block; and because of entropy which we add to the genesis block hashing process; each time a new chain is hashed which has contracts in the genesis block (namely, when it is not a simple ethereum clone) the identifier of the chain will be unique.
All eris:db nodes work off of the concept of a chainID which is simply the genesis block hash. The first thing a eris:db client will do upon connecting to a peer is to ask the peer what chainID that eris:db client is running. If there is a mismatch of chainIDs then the peers will not connect.
These two concepts: the necessity of maintaining a stable chainID for an application specific blockchain; along with the uniqueness of the chainID hashing process – are features of the eris:db blockchain client but they must be dealt with carefully.
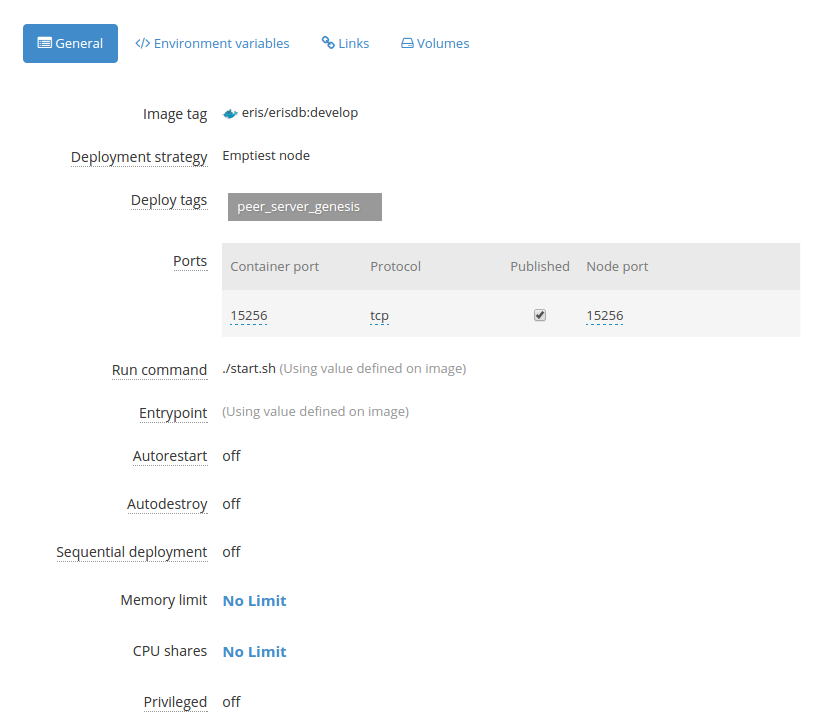
The genesis node we use is established to only serve the genesis block. This node hashes the chain and then opens its fetch_port as we call it which will serve its genesis block. It does not connect into the peer network at all and simply exists only to serve a stable genesis block to the peers whenever the peers boot up.
Why is this node only doing this? Seems like it could be a waste?
That is also what I thought at first. But in our testing we have found that sometimes – in particular on low density, irregularly committed chains – the peering process of the blockchain nodes will slowly drop peers to the point where the node will basically shut itself off. This is, again, a feature not a bug which is meant to not overload computers running a node which is …
This means, though, that the peer servers sometimes need to be restarted. But when they are restarted, if they are meant to hash a blockchain they will then have a new chainID. So instead, we have a stable, non-peering, genesis block server node which is stable and does not time out.
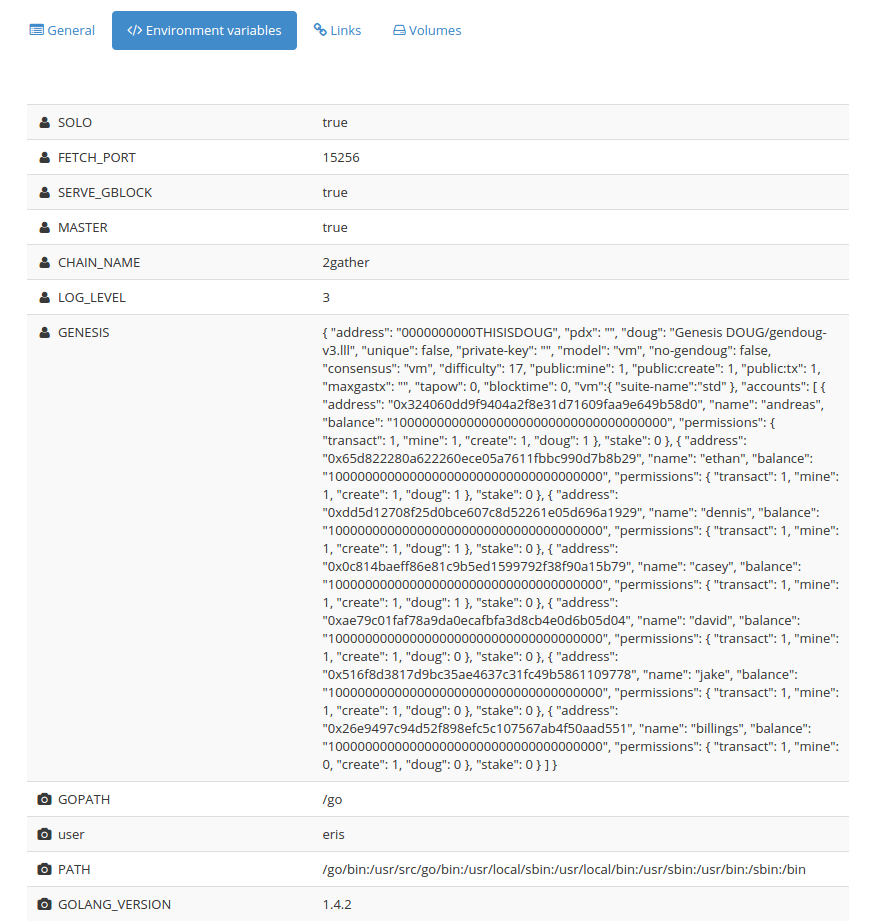
Here is how we configure the node:


As you can see most of the configuration happens using environment variables. These environment variables are used mostly by the start script to configure the node when it boots.
Node Type 2: Peer Server Master
The second type of node we establish to use an application specific blockchain is a master peer server. This is the main access point for the nodes on the chain.
When this node boots, it first uses epm fetch to fetch the genesis block from the genesis_node and then it configures itself and boots up the eris:db chain it needs to run. This process makes it ultra smooth to reset the running container if its peering process times out due to low-density networks and/or irregular committing.
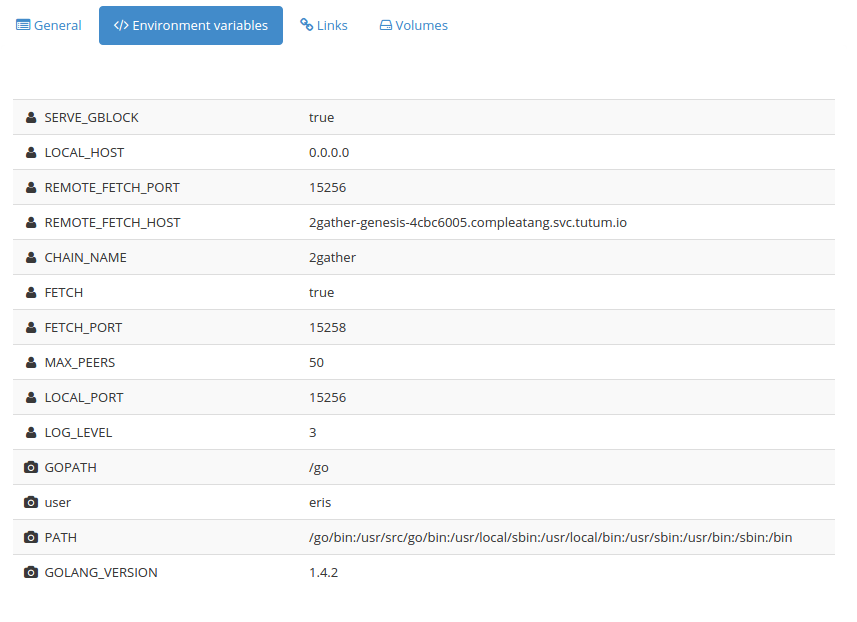
Here is how we configure the node:

As with the genesis node, these environment variables should make sense when one compares what is passed to the container to the start script linked to above.
Node Type 3: Peer Server Relays
The final type of node we use when working with application specific blockchains is peer relay nodes. We establish these on a distributed basis using Tutum’s very clever deployment tags and deployment strategy features.
Tutum allows us to deploy individual nodes using AWS and Digital Ocean as I said before. Each of these machines we can give a specific tag. We have deployed machines to data centers in: Northern China, Singapore, Sydney, Frankfurt, Amsterdam, London, Virginia, Oregon, and Sao Paolo which is a pretty reasonable geographical distribution of nodes. These nodes are then tagged using a peer_cluster tag. For more on deployment tags, see Tutum’s documentation on the feature
We then establish a Tutum Service and add the peer_cluster deployment tag to the Peer Relay service. In addition we use Tutum’s deployment strategy feature which we set to “Emptiest node”. This allows us to have a good geographical distribution of the nodes.
Once the service boots up we can scale it from 0 to 9 relay nodes by simply dragging a slider bar in Tutum’s web app or sending a simple API call from Tutum’s command line interface. So if we need more relay nodes we can scale the service as simply as folks scale their Heroku apps but with the added benefit of scaling across a geographically distributed set of machines rather than only to Heroku’s machines.
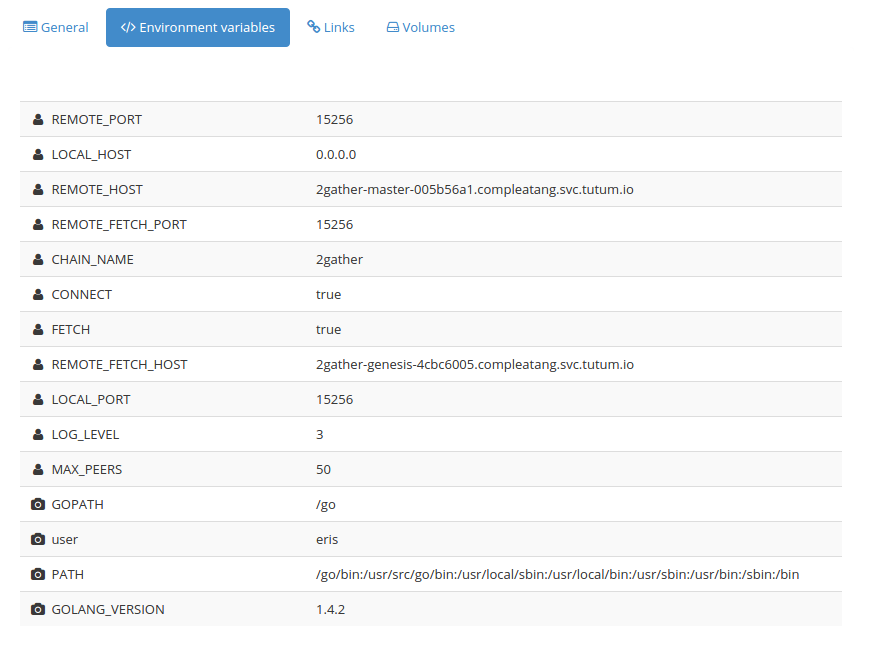
Here is how we configure the relay nodes:

One other feature of Tutum we use to establish this network which keen observers will see is that Tutum gives each service its own DNS entry which we can use within the network. This means that if we have to drop a machine from a specific cluster or change a machine within a specific cluster (which will change the IP of the containers running on the machine) that we will not have any problems with the peer network. This is not actually the optimal way to do this. Ideally, we would configure these as linked containers using Tutum’s stacks feature which operates very similarly for cloud deployments to how Docker-Compose (formerly fig) works for local development and operation of sets of containers.
Conclusion
If you have any questions please drop them below, or, better, stop by #erisindustries.